Your cart is currently empty!
Create a Custom Blog Page
To create a custom blog page on any page of your website, you can utilize the “query_args” custom field.
Important Note: It’s important to note that this page should not be designated as the Posts page in Appearance > Customize > Homepage Settings.
To begin, navigate to Pages > Add New and create a new page that will serve as the designated area for displaying your posts. Keep this page empty, as it will automatically populate with your latest posts.
Once you’ve created the new page, enable custom fields for it.
In this article:
- Display all categories on the page
- Display one or more category on the page
- Exclude one or more category from the page
- Set the number of posts to display on the page
- How to find the category ID
If you’re new to using custom fields or query_args, keep in mind that you may need to click “Enter new” (as depicted below) to begin the process.

Display all categories on the page #
To showcase all categories, add the “category” parameter to the value field, following the steps outlined below.
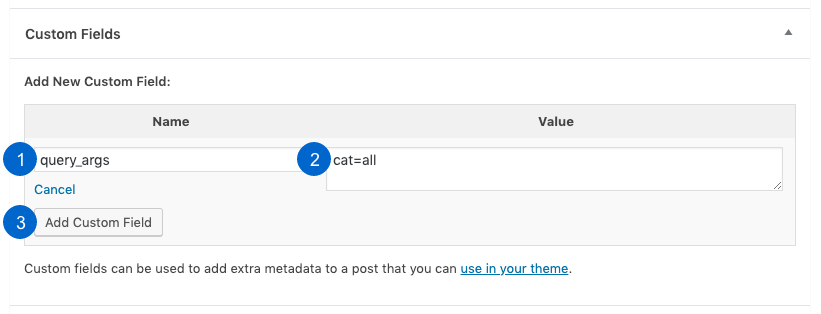
- In the “Name” field, enter or select “query_args“.
- In the “Value” field, input “cat=all” to display all posts from all categories on the page.
- Click “Add Custom Field” to save your settings.
Display one or more category on the page #
To display certain categories, include the category ID parameter in the value field, following the steps outlined below.
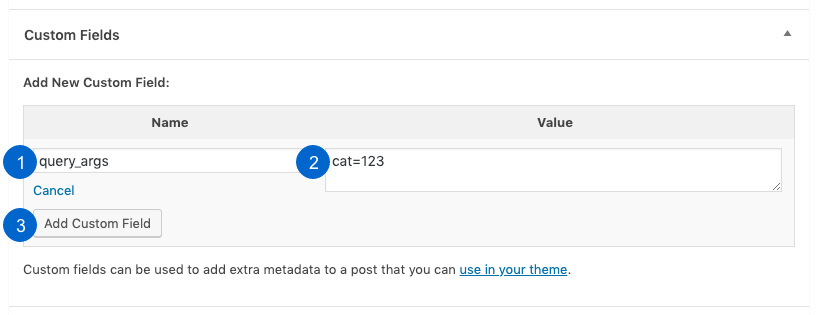
- In the “Name” field, input or select “query_args“.
- In the “Value” field, add “cat=<id>” and replace “<id>” with the ID number of the category you want to display. If you want to display more than one category, separate their ID numbers with commas. For example, if you wish to display posts from categories with the ID numbers of 1, 3, and 4, you should type in “cat=1,3,4“.
- Click “Add Custom Field” to save your changes.
Exclude one or more category from the page #
If you want to exclude a particular category, you can add a minus symbol (dash) in front of the category ID parameter in the value field, following the steps outlined below.

- In the “Name” field, input or select “query_args“.
- In the “Value” field, add “cat=-<id>” and replace “<id>” with the ID number of the category you wish to exclude. If you want to exclude multiple categories, separate their ID numbers with commas and include the dash before each ID number. For instance, if you want to exclude posts from categories with the ID numbers of 1, 3, and 4, you should type in “cat=-1,-3,-4“.
- Click “Add Custom Field” to save your changes.
Set the number of posts to display on the page #
By default, the number of posts shown per page is set in Settings > Reading > Blog pages show at most.
But, you can display a different number of posts on this particular page by inserting the “showposts” parameter in the value field. In case you add multiple parameters, remember to separate them using the ampersand symbol (&).
In the following example, only one post from category 1 will be showcased on the page.
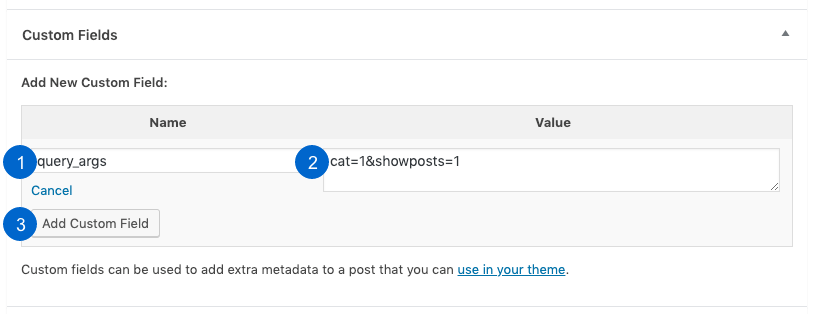
- In the “Name” field, input or select “query_args“.
- In the “Value” field, add “cat=<id>” and replace “<id>” with the ID number of the category you want to showcase. If you want to feature posts from multiple categories, separate their ID numbers with commas. For example, if you want to display posts from categories with the ID numbers of 1, 3, and 4, you should type in “cat=1,3,4“. After inputting the category parameter, add an ampersand symbol (&) and then include “showposts=<x>”, replacing “<x>” with the number of posts you want to display.
- Click “Add Custom Field” to save your changes.
How to find the category ID #
There are three methods to locate the category ID.
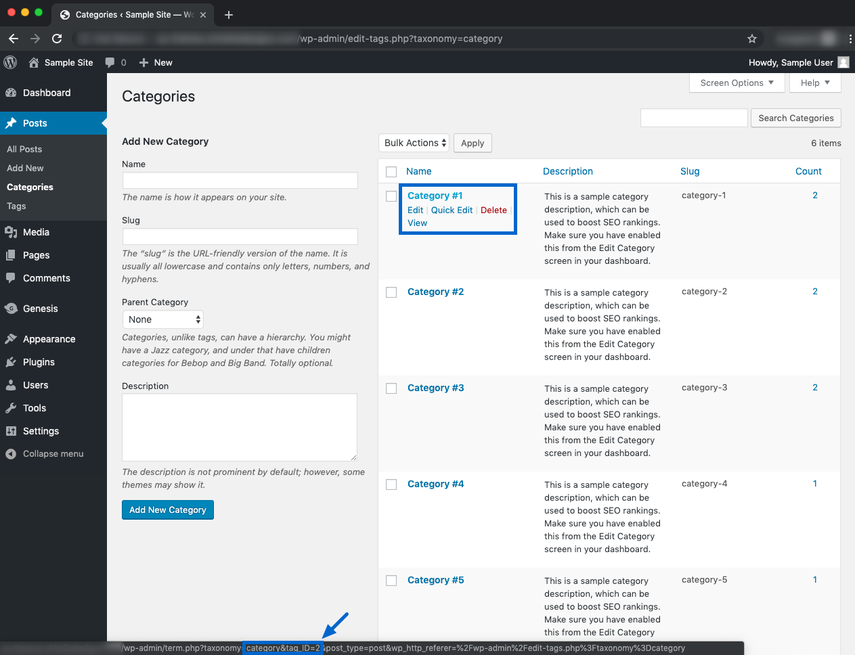
1. To uncover the category ID, navigate to Posts > Categories, and hover over the category name until the URL appears at the bottom of the screen. In the following example image, we hovered over a category called “Category #1”, which revealed the category ID at the bottom of the screen. In this specific scenario, the category ID is 2.
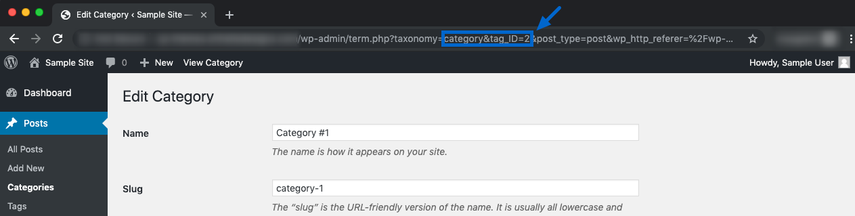
2. Another way to obtain the category ID is by clicking on the category name while on the Posts > Categories page. Next, you can locate the category ID in your browser’s address bar, as demonstrated in the image below. In this instance, the category ID is 2.
3. You can also use a third-party plugin, such as Reveal IDs, to view the category IDs. After installing and activating the plugin, navigate to Posts > Categories, where you can view the IDs listed in the table next to each category.


