Your cart is currently empty!
How to Install and Activate the Genesis Framework or a Genesis Child Theme
The process of setting up the Genesis Framework and a child theme is similar to installing any other WordPress theme, with the distinction that you will be installing two themes. First, you need to install the Genesis Framework, followed by the installation and activation of a child theme.
Note:
- For websites hosted on WordPress.com (e.g., mysite.wordpress.com), the Genesis Framework and new themes cannot be installed unless you possess a business account. This limitation applies to sites hosted on WordPress.com.
There are two methods for installing the Genesis parent theme or a Genesis child theme:
- Using the WordPress dashboard’s upload feature for an automatic installation. (Recommended)
- Manually transferring files with an FTP client, which enables file movement between locations. (Advanced)
Important Note: Before activating a child theme, ensure that the Genesis Framework (parent theme) has been installed. It must be located in the /wp-content/themes/ directory on your server. Additionally, the folder containing the Genesis framework files should be named “genesis” (excluding the quotation marks).
Installing Genesis or a Child Theme Through the WordPress Dashboard #
You can set up the Genesis Framework and a child theme using the WordPress dashboard’s upload feature by following the steps outlined below. First, install Genesis, then repeat the process for the child theme.
Ensure that you have logged into your account and downloaded the zip files for both Genesis and the child theme. Keep the files in their compressed state (do not extract them) for the dashboard installation.
Note: If your downloaded theme appears as a folder full of files instead of a zip file, it’s due to a setting on your computer. To re-compress it, right-click on the folder name and select Compress.
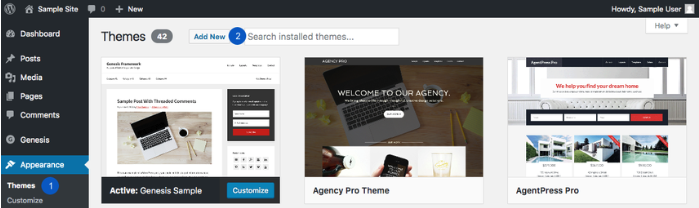
1. Access your WordPress dashboard and navigate to Appearance > Themes.
2. Click the Add New button at the top of the page (as shown below).
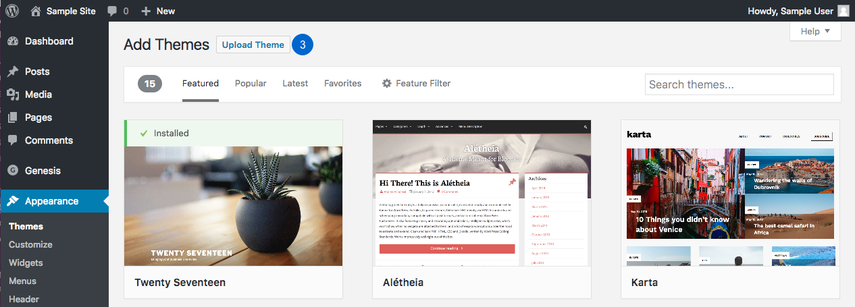
3. In the following screen, select the Upload Theme button located at the top of the page (as depicted below).
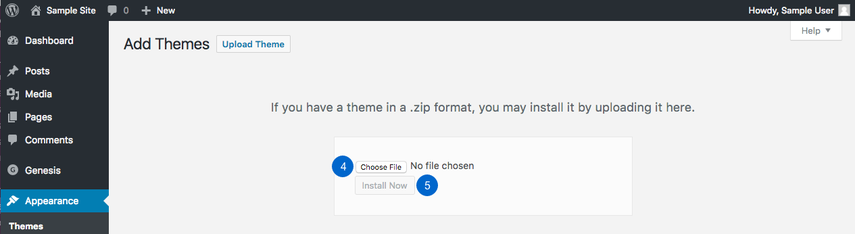
4. On the following page, select the Choose File option (as shown in the image below) and browse through your computer to find the theme file. Typically, the file would be named after the theme and end with a .zip extension (e.g., genesis.zip or genesis-sample.zip).
5. Once you have chosen the theme file for uploading, click on the Install Now button (illustrated below).
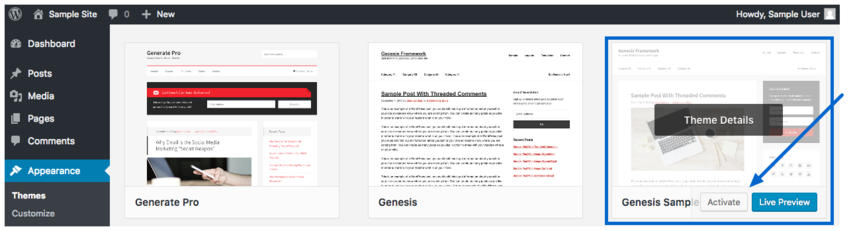
6. Afterward, on the subsequent page, you will observe three links as illustrated below and explained further:
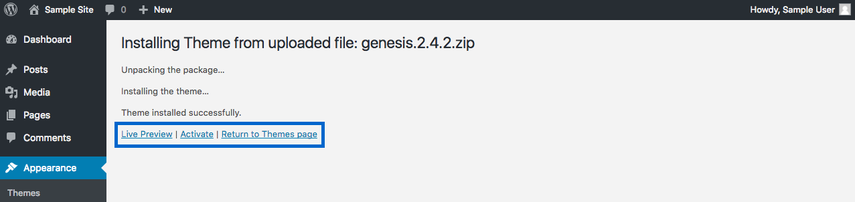
- Live Preview: This option allows you to preview your website with the newly installed theme before making it live.
- Activate: By selecting this option, you can apply the newly installed theme to your live website. However, it’s important to note that you don’t need to activate the Genesis Framework after installation. Instead, you must install and activate a child theme.
- Return to Themes page: Clicking on this link will redirect you to the Appearance > Themes page, where you can view all your installed themes and choose to install the desired Genesis child theme.
After successfully installing the Genesis Framework, click on the Return to Themes page link (as illustrated above), and follow steps 1 – 5 again to install a child theme.
Once you have installed a child theme, you can activate it and begin setting up your website. Refer to the instructions on how to activate a child theme.
How to Install Genesis or a Child Theme With an FTP Client #
If you prefer, you can manually install the Genesis Framework and a child theme using an FTP client. This process can also be used to update Genesis manually in case your server files have been corrupted or your host blocks automatic update notifications.
To perform this method, you’ll need to use an FTP program. Here are a few popular programs:
However, make sure to choose a program that is compatible with your operating system. Additionally, before starting, ensure that you have downloaded the zip files of Genesis and the child theme to your account.
- Unzip the downloaded files to your desktop. When you unzip genesis.zip, you’ll notice a theme folder inside labeled genesis. Similarly, when you extract a child theme file, you’ll see a theme folder inside named after the child theme (e.g., genesis-sample).
Note: The genesis folder should not be renamed because child themes specifically look for this exact name, and any other variation won’t be detected by the child theme. Moreover, the genesis folder cannot be placed inside another folder.
- Log in to your website’s server using an FTP client and locate the wp-content directory. You may need to open a directory called public_html to see the wp-content directory.
Below is an image of what it looks like when using the Transmit FTP client. The list on the left displays the files on your local computer, while the right shows the files on your website server.
3. Navigate to the wp-content directory and locate the themes directory within, as illustrated in the image below.
4. Access the themes directory and transfer the complete unzipped theme folder from your local computer to this directory. Both the genesis theme folder and the child theme folder must be transferred to this directory.
Important Note: that if the child theme’s name consists of more than one word, the folder name will have hyphens instead of spaces. Moreover, like the genesis folder, the child theme folder must not be nested within another folder.
Image caption: The image below depicts both the genesis and genesis-sample folders after they have been transferred to the themes directory.
Once you have uploaded both the Genesis Framework and a child theme, you can proceed to activate the child theme and start configuring your website. Check out the instructions on how to activate a child theme below.
FTP Tutorials & Resources #
If you’re not certain how to connect to your website’s server through an FTP client, you can refer to the links below for tutorials and guides on some popular FTP programs:
Additionally, you may find the following resources from popular web hosting providers helpful:
Activate the Child Theme #
Once you have installed both the Genesis Framework and a child theme, you can proceed to activate the child theme. Note that it’s not required to activate the Genesis Framework theme because it operates silently in the background. However, make sure to install the Genesis Framework before activating a child theme.
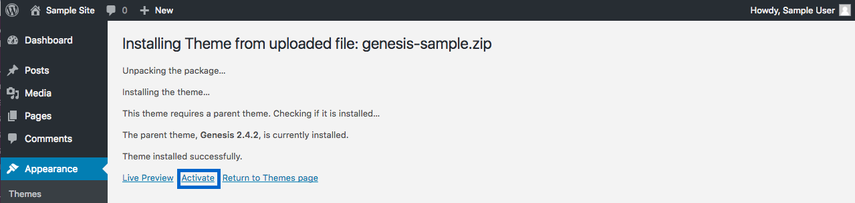
If you installed the child theme from within the WordPress Dashboard, click on the Activate link (as depicted below) that displays on the screen after the upload process is done.
If you installed the child theme via FTP, you can activate the theme directly on the Themes page by logging in to your WordPress Dashboard and selecting Appearance > Themes. Hover over the installed child theme and click on the Activate button (as depicted below).