Your cart is currently empty!
How to Update the Genesis Framework
Table Of Contents
To maintain optimal security, speed, and compatibility for your website, it’s crucial to keep the Genesis Framework parent theme up-to-date. Updating the Genesis Framework won’t impact any of your child theme files or website data, ensuring that your child theme customizations and existing content are preserved when you update Genesis. However, if you’ve modified any of the Genesis parent theme files (which isn’t recommended), those changes will be overwritten during the update process.
To ensure that you don’t lose any important data or files during the update process, we highly recommend backing up your child theme and current version of Genesis before you begin.
There are several ways to update Genesis. You can choose from the following options:
- Automatically Check for Updates
- Manually Check for Updates
- Update Via FTP
Automatically Check for Updates #
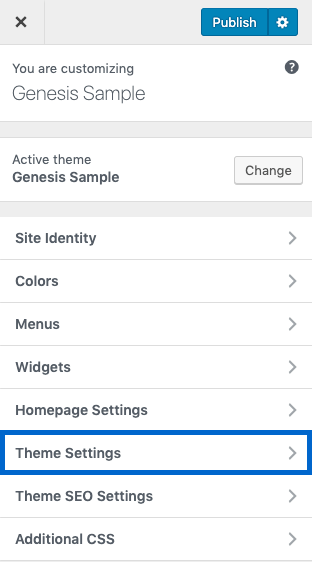
To ensure that you have the latest version of Genesis and update it if required, start by navigating to Appearance > Customize > Theme Settings.
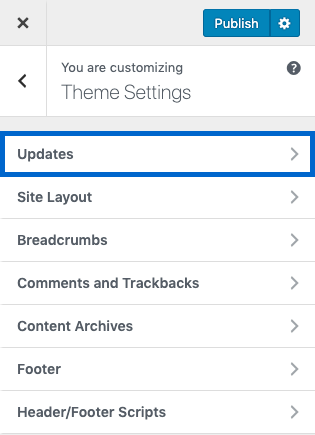
Next, click on the Updates option.
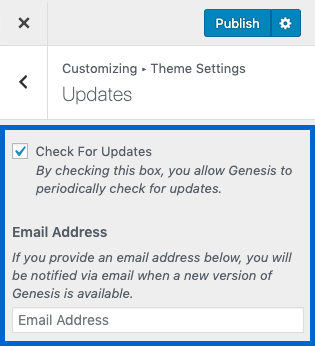
Make sure that the Check For Updates box is selected, as shown below. You can also enter your email in the Email address field to receive notifications when a new version of Genesis is available. Finally, click on the Publish button to save your settings.
Once you have saved your changes, a notice box will appear at the top of your WordPress dashboard when a new version of Genesis is available. It may be necessary to refresh the page after changing the check for updates setting before this notice appears.
If a new version is available, click the “Update Now” link in the notice box to update Genesis to the latest version.

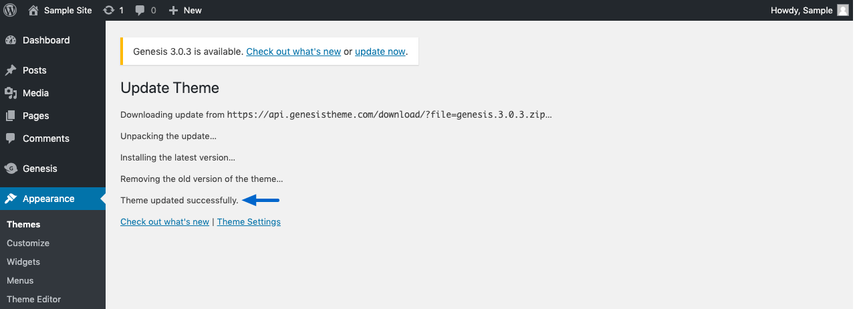
Your website will automatically install the new version of Genesis and remove the old version. You’ll know that the process is complete when you see the “Theme updated successfully” message, as shown below.
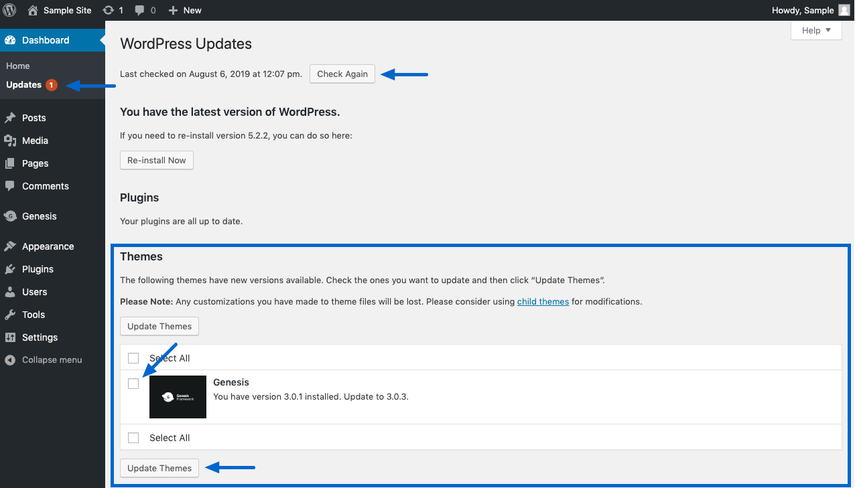
Manually Check for Updates #
If you are aware of a new version of Genesis available but don’t see the notification box, you can manually check for updates by navigating to Dashboard > Updates and clicking the Check Again button. The available updates for themes, including the Genesis Framework, will be listed in the Themes section.
Choose Genesis from the list and click on Update Themes to initiate the update.
This message indicates that the update for the Genesis Framework was successful. You can then navigate back to the Themes or WordPress Updates page using the provided links.

Update Via FTP #
If you’ve selected the Check for Updates check box and you still don’t see an update notification in your WordPress dashboard, or if you prefer to update manually, you can install the latest version of Genesis via FTP.
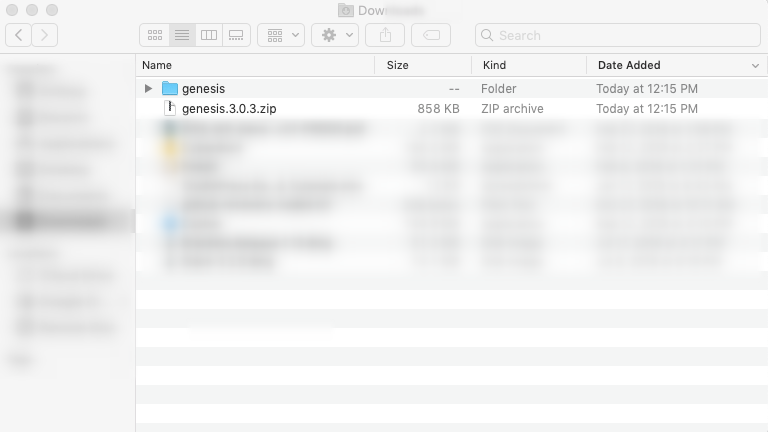
First, log into your account and download the latest version of Genesis.
The downloaded file will be a zip file containing the latest version of Genesis. Make sure to unzip the file, which should create a folder named genesis. It is important not to rename this folder or modify its contents.
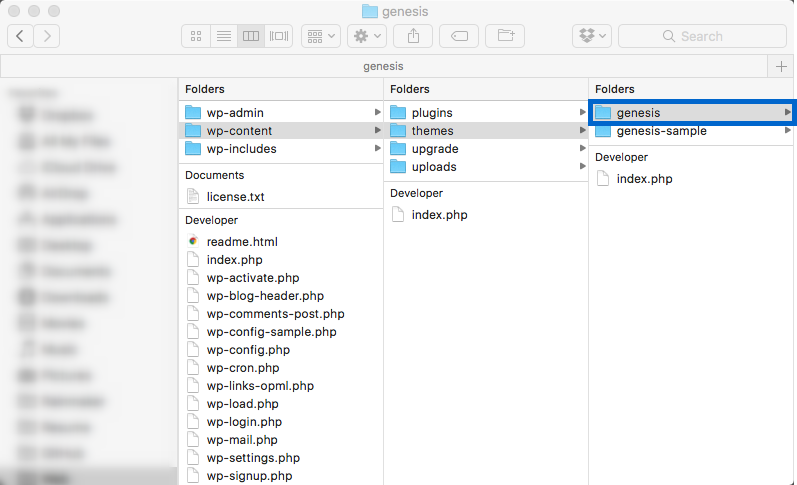
Next, connect to your site using FTP and navigate to the wp-content/themes directory to locate the existing Genesis folder. If you want to create a backup copy of this folder, you can do it now. Once you’re ready, replace (overwrite) the existing Genesis folder in the directory with the unzipped Genesis folder you downloaded from the StudioPress downloads page.
Important: It’s essential to note that you shouldn’t rename the Genesis folder, as child themes are designed to look specifically for this name. Additionally, the Genesis folder must not be nested inside another folder.
After you have uploaded the new folder and files, refresh your website. This should update your website to the latest version of Genesis.


